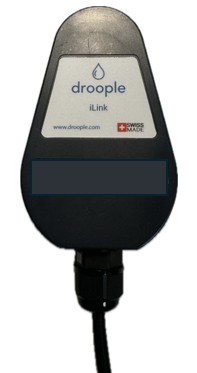
Droople iLink LoRa
Thank you for choosing our LoRa product! Follow the simple four-step process to get started

Our Droople iLink LoRa supports various sensor types, including:
- Flow & Temperature Sensors
- Flow, Temperature & Conductivity Sensors
- Water Pressure Sensors
- CO2 Pressure Sensors
Flow Sensors Installation
- Turn off the water supply before beginning the installation
- Position the flow sensor in the desired location, ensuring correct alignment with the flow direction (indicated by an arrow on the sensor)
- To protect the sensor's internal propeller from obstructions, we strongly recommend installing a strainer filter upstream of the sensor

Pressure Sensors Installation
- Depressurize the system (water or CO₂) before starting the installation to ensure safety
- During the instllation, do not forget to use the provided O-ring gasket to prevent leaks
- Tighten the connection securely , but avoid over-tightening, which could damage the sensor
- Once installed, re-pressurize the system carefully and check for any leak


Note: There is also a version available that includes 4 antenna ports to support additional connectivity options.
- Attach the LoRaWAN antenna to the right connector. (the LoRa antenna is marked with a sticker).

2. Attach the 4G antenna to the left connector.

3. The two antennas are now installed.

Note: Here is the version with 4 antenna ports. Below is how to connect the three antennas included in the box.

4. Plug the AC adapter to the PicoNext gateway and plug it into a wall socket. The gateway should ideally be installed in the same room as the iLink.

5. Once plugged, the gateway will start automatically. After 5 - 10 minutes, all the LED’s should be solid green if the gateway is correctly connected.
- Connect the sensor to the iLink using the M8 or M12 connectors cables.
Be careful to plug the cables in the correct way and make sure
that the pins on the two connectors are aligned.

2. Tighten the screw of the connectors to secure the connection.
3. Remove the plastic tab to turn on the iLink.

4. Screw the three screws in order to secure the back cover of the iLink.

5. Place the iLink in a way that no water can leak onto it. Use zip ties or double-sided tapes to secure its position.
- Locate the QR code on your iLink
2. Scan the QR code using your smartphone

3. Follow the on-screen configuration tutorial to:
- Create a new asset or assign the device to an existing asset
- Configure the ports with the correct sensor type and dimensions
- This step is critical: if the selected sensor dimensions are incorrect, the measurements will not be accurate
- To find the sensor type and dimensions, refer to the label on the sensor's packaging
4. If applicable, attach consumables such as:
- Filters (e.g., for flow sensors)
- CO2 bottles (for CO2 pressure sensors)
- These consumable details will be tracked by the platform to help you:
- Plan filter replacements based on historical consumption
- Automatically recommend a CO₂ bottle replacement when the remaining level reaches 10%
Congratulations!
You've successfully set up your LoRa device. Your system is now ready for use, and you can begin monitoring your data directly through the Droople platform
To help you with the installation process, we’ve created video guides for each sensor type, explaining step-by-step how to install your hardware. Please refer to the video links below for detailed instructions based on your specific sensor type.
Flow & Temperature Sensor - iLink - MiniHub
Flow & Temperature Sensor - iLink - PicoNext 4G
Flow & Temperature & Conductivity Sensor - iLink - MiniHub
Flow & Temperature & Conductivity Sensor - iLink - PicoNext 4G
Pressure Sensor - iLink - MiniHub
Pressure Sensor - iLink - PicoNext 4G